本文目录
ps怎么进行批量处理
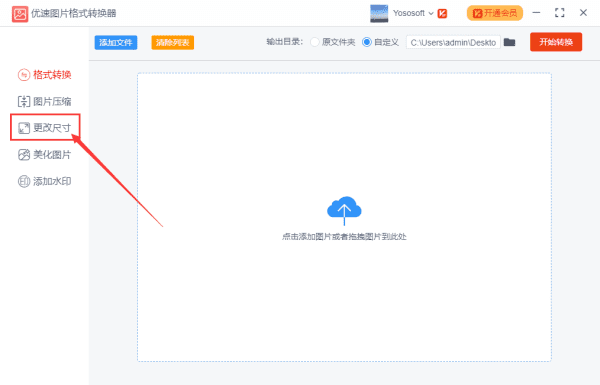
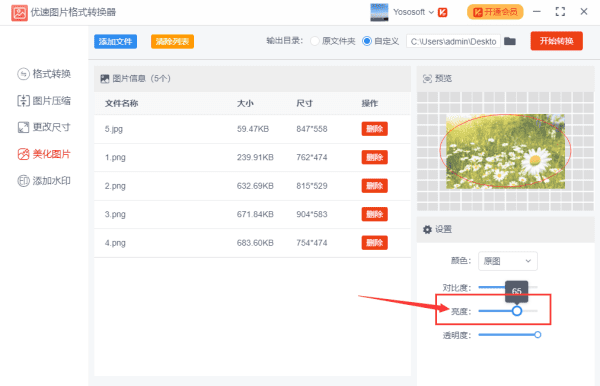
批量调整图片亮度的方法:
步骤1,安装打开工具软件,点击软件界面左边的“美化图片”功能,这里可以有调整图片亮度的功能。
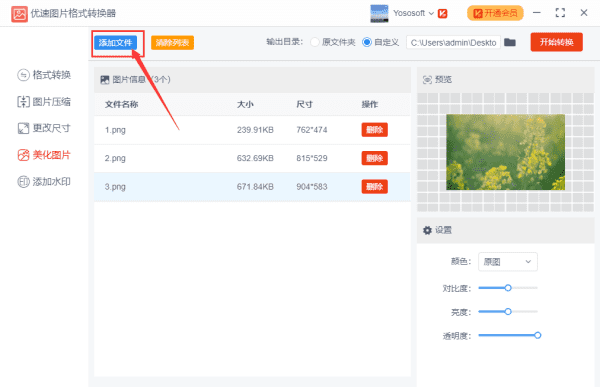
步骤2,将需要调整亮度的图片批量添加到软件中,可以用过点击“添加文件”按钮或直接拖动图片的方式进行添加,软件支持批量调整,请一次性将图片添加完。
步骤3,添加好图片后软件右下方会出现一个设置的区域,鼠标左右拖动圆点即可调整图片亮度,往左是变暗,往右是变亮。上方可以预览到图片转换后的效果。
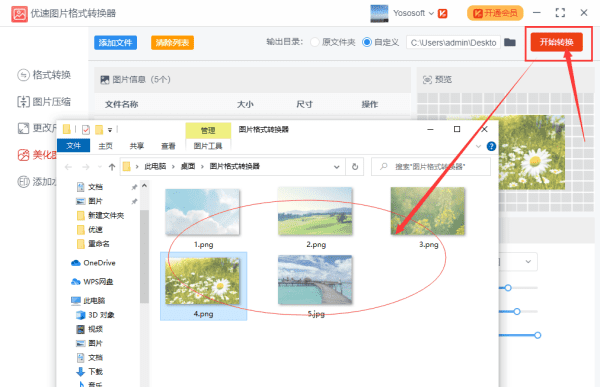
步骤4,然后点击右上方的“开始转换”按钮,启动软件程序,当批量处理完成后,软件会自动打开一个文件夹,调整亮度后的图片会全部保存到这个文件夹内。
ps多个动作如何批量处理
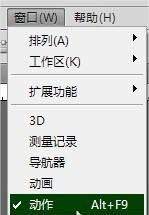
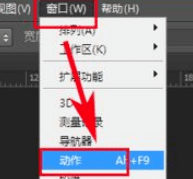
1、首先“窗口-动作”(快捷AltF9)调出动作面板。
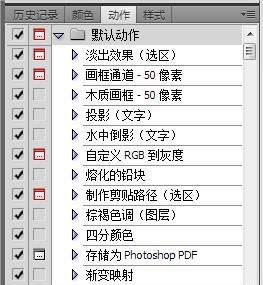
2、在动作面板底选择,第5个按钮(创建新动作)并命名。

3、然后处理图片,完成后点击第1个按钮。

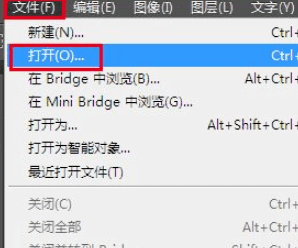
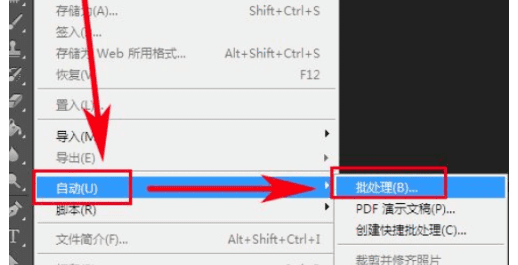
4、“文件-自动-批处理”,

在“动作”下拉菜单中选择新建好的动作,在源中选择你要多个处理的文件,即可。
ps怎么设置动作批处理
如何在PS里面设置动作对图片进行批处理呢?今天就教大家如何去操作使用方法步骤。
材料/工具
电脑
方法
1/7
打开PS软件,打开一张你需要修改的图片。
请点击输入图片描述
2/7
在菜单栏单击窗口,选择动作。
请点击输入图片描述
3/7
这时候右上角会出现一个‘动作’对话框,点击下面的创建新动作。
请点击输入图片描述
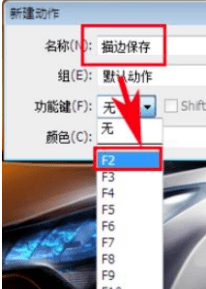
4/7
设置一下快捷键,点击【记录】。
请点击输入图片描述
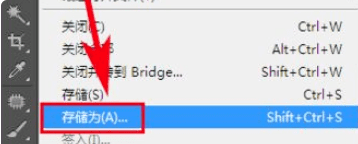
5/7
点击【存储为】。
请点击输入图片描述
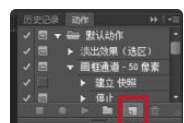
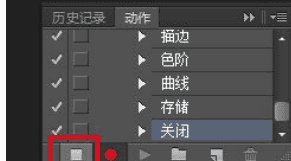
6/7
所有动作都操作完了,点击右上角的动作下面第一个正方形图表,即可保存。
请点击输入图片描述
7/7
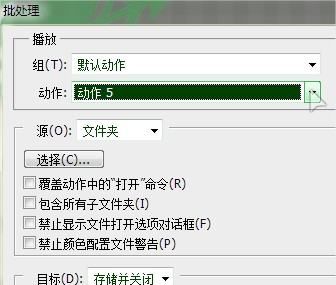
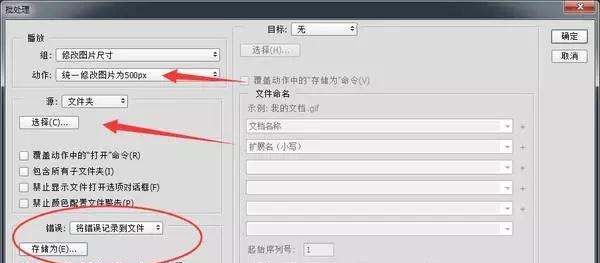
点击文件,选择自动,点击批处理。会弹出一个批处理的对话框。进行对动作、源、目标、文件命名进行设置,点击确定。即可坐着等系统整个文件夹的图片进行自动处理。
ps里怎么批量处理图片
批量处理图片步骤:
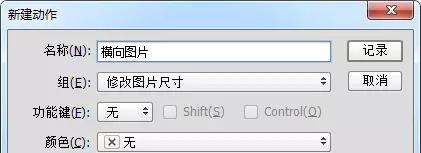
1、新建一个动作,针对横向尺寸图片,开始记录。
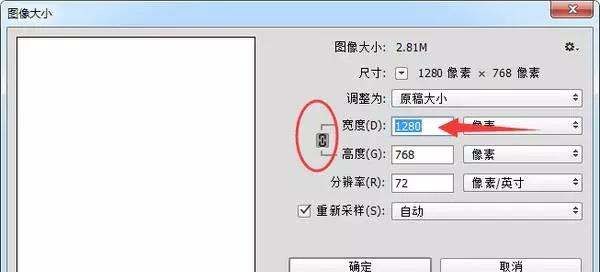
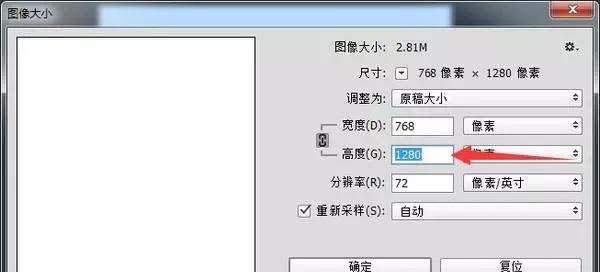
2、调整图像大小,等比例,宽度改为500像素。
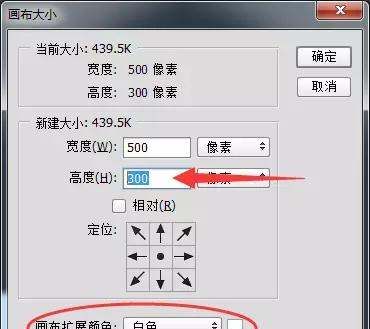
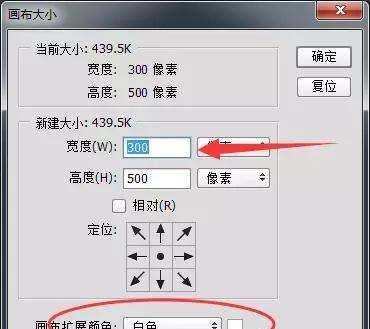
3、修改画布大小,高度改为500,扩展颜色记得选择你要的白色底
4、然后,保存,关闭。这就结束了。第二个动作是竖向的。和刚刚一样,区别就是我们先调高度变为500。
5、画布那里是宽度调为500。
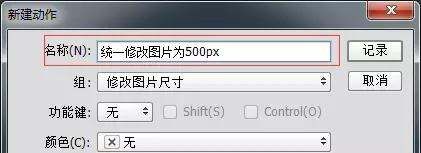
6、然后一样的是保存关闭。第三个动作是最关键的。新建一个动作,名字你随意。
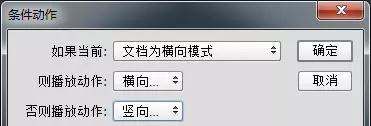
7、在动作菜单面板上面找到插入条件。
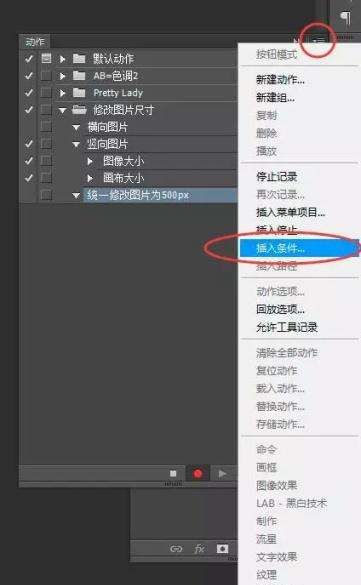
8、选择如果文档为横向模式,则播放动作横向图片,否则播放动作竖向图片。
9、下面是正常的批处理了,文件——自动——批处理。
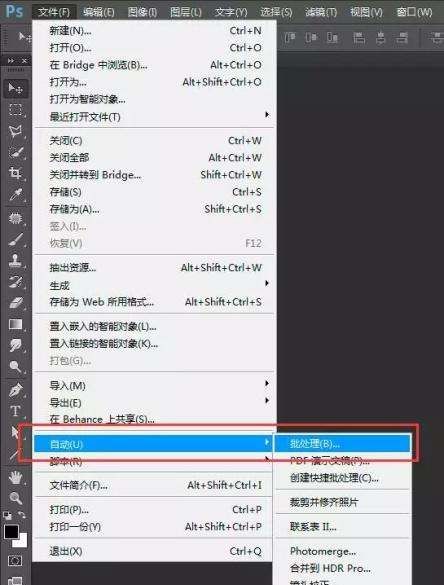
10、选择最后我们做的那个动作,选择你图片的文件夹,记得不要让他因错误而停止。
以上就是关于ps如何批处理,ps怎么进行批量处理的全部内容,以及ps如何批处理图片的相关内容,希望能够帮到您。
版权声明:本文来自用户投稿,不代表【蒲公英】立场,本平台所发表的文章、图片属于原权利人所有,因客观原因,或会存在不当使用的情况,非恶意侵犯原权利人相关权益,敬请相关权利人谅解并与我们联系(邮箱:350149276@qq.com)我们将及时处理,共同维护良好的网络创作环境。